Basically, Loginizer Plugin is a tool that aims at securing your WordPress websites from all attacks. We believe that security is the most important aspect of a website and it should be easy to secure a website for any website owner. Hence, that’s why they work round the clock to craft features that help you achieve that without having to constantly monitor your website.
They are constantly working hard to add more features and think of ways to protect your website from brute-force attacks. One of the main reasons to consider using Loginizer is that Brute Force Attacks are still an issue for many WordPress websites. But, the good news is that there are several ways you can protect yourself and your website from this kind of attack.
Simply put, a brute force attack is an attempt to crack a password or username or find a hidden web page, or keys used to encrypt a message. It uses a trial and error approach method in hopes that it will eventually guess correctly. For newcomer webmasters, this kind of attack is actually an old method, but it is still widely used and oftentimes successful.
Depending on how complex a password is, cracking it can take anywhere from a few seconds, to years. Suffice it to say, solid custom brute force protection is hard to come by these days. This is, especially, true if you are looking to get that kind of protection for free. However, now you can with a smooth plugin called Loginizer that comes with inbuilt tools to cater to that.
What Does The WordPress Loginizer Plugin Offer?
To enumerate, Loginizer Plugin is a simple and effortless tool that takes care of all your security problems. It comes with a default optimal configuration to protect your website from Brute Force attacks. It’s very lightweight, easy to install, and easy to set up, and it works in the fight against brute force attacks by blocking logins for the IP after it reaches the maximum retries.
The plugin is automatically running once you activate it, so immediately, it goes to work based on default settings. However, you can also go to the configuration page and perform a setup more tailored to what you want for your website. Loginizer gives you the ability to blacklist and whitelist IPs for login as well. So you have a good amount of control right away.
There are also several other ways to control a brute force attack, all of which are presented to you within the plugin. Once the user tries to log in unsuccessfully a certain amount of times (based on your settings) they are hit with an automatic WordPress lockout and won’t be able to access anything. Not forgetting, these kinds of attacks happen to WordPress sites often.
That’s why it is good to have a tool in place to help protect your website against them. IBM created a report showing that some hackers will target the same system for months and even years at a time. Their data shows how dedicated and resourceful hackers are and how they will wait and wait while the brute force attacks continue to go to work on a website over time.
Some of the main plugin features include:
- Block and IP after maximum retries are hit
- Extended lockout option after maximum lockouts
- Sends email notification after maximum lockouts are hit
- Blacklist IP/IP Range
- Whitelist IP/IP Range
- You can check all logs of failed attempts in the backend
- Create and delete IP ranges
See, the WordPress Loginizer Plugin offers you all the tools that you’ll need to secure your overall WordPress website with the best security features. Add a much-needed layer of security to your WordPress website. Loginizer is built to secure the core of your WordPress with multiple features like Bruteforce protection, 2FA, Captcha, MD5 Checksum, and much more…
Here is how the plugin helps your website:
- BruteForce Protection: Get protection from hackers’ repeated attempts to gain access to your account
- reCaptcha: It protects your website from fraud and abuse using complex challenges to block malicious activities
- LockOut: Set up Auto LOCKOUT for IPs after a max number of failed attempts — optimal settings are pre-configured
- Two-Factor Authentication: Configure a Two-Factor Authentication (2FA) on email, mobile, or authenticator apps
- Black/Whitelist IP: Create a list of trusted/untrusted IP addresses for users and websites login that are allowed/blocked
- Detailed Logs: Get detailed logs of failed attempts and all other suspicious activity and easily monitor them on the go
Note that although there are many other website security and safety plugins for WordPress websites out there, Loginizer is a plugin that will carry the burden for most of them under one roof. Thus, it’s a tool worth trying to secure your website. It comes with a Free WordPress plugin that can be installed for instant brute force protection for your WordPress website.
To get started, just download and install the plugin for free, and your website will be fully protected from the very first minute. In fact, there are over 1 Million+ active installations already on WordPress. Equally important, the WordPress Loginizer Plugin is also trusted by more than a Million active websites — over 800+ 5 Star Reviews on wordpress.org to be precise.
The Simple Steps To Install And Activate The Loginizer Plugin
Loginizer gives you custom write force protection for free. Let’s take a look at how to install the plugin and then set it up. On that note, if you are already satisfied with our introductory part, you can watch the video guide below for the basic installation instructions. But, if you are a beginner webmaster, it’s good that you follow our guide to the end so as to learn more first.
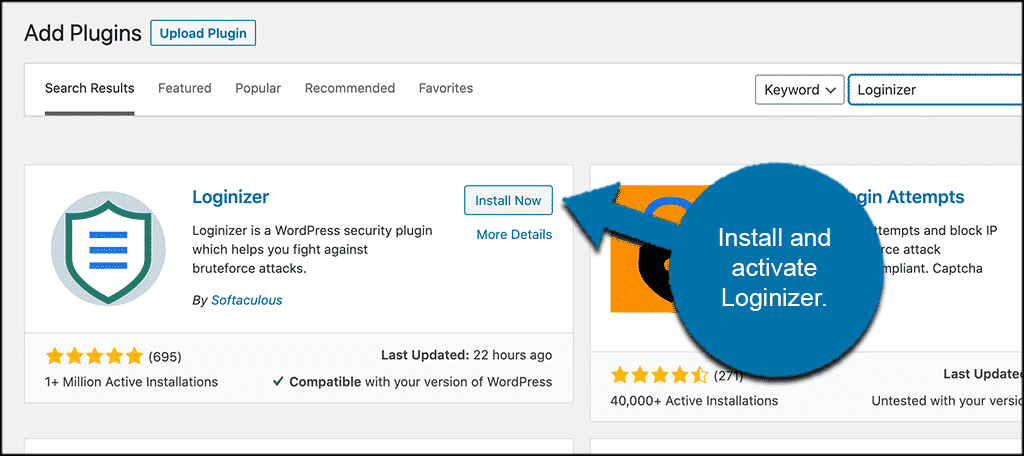
To start using it to help against brute force attacks, you first need to install and activate the plugin. For your information, you can achieve this by going to the Plugins Page inside your WordPress Admin Dashboard to access all the features. Simply search for the plugin by name and install it right from there. Or just download the plugin files for installation.
Once installed and activated, you want to access the main settings and configuration page. To do this, click on Loginizer Security > Brute Force. You’ll see this option in the left-side menu area of your dashboard upon the plugin activation.

From here you can configure the plugin how you see fit according to your needs. However, note that the unique WordPress Loginizer plugin starts running automatically as soon as it is installed. Thus, you can configure it from there.
Setting Up Your Custom Brute Force Protection
At this point, you should be on the main configuration page for the Loginizer plugin. It is a single-page layout but has a few different options to go over. Let’s go over these together. At the top portion of the page, you will see a box that shows you all the failed login attempts over the last 24 hours. Basically, here you can see who is trying to log in and when they try.

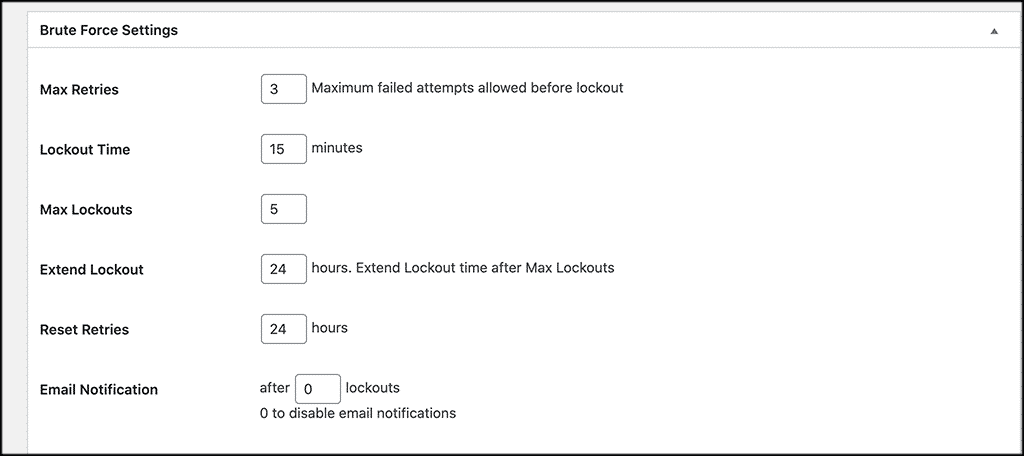
This is a valuable list to have because you can use it to blacklist or whitelist IPs. Now scroll down some and give the “Brute Force Settings” configuration box a look. Perse, here’s where you’ll set all your entry limits and lockout times. This is the heart of your setup. Go ahead and fill out all the entries according to how you want them to take hold on your website.
Below that, you will find the configuration box for the blacklist IP settings. Obviously, this is where you’ll find the configuration tools that you can use to help you blacklist as many IPs as you want. So, feel free to add any that you already have in a list.

By the same token, the same case applies to the whitelist IP box — where you can also whitelist as many as you want.
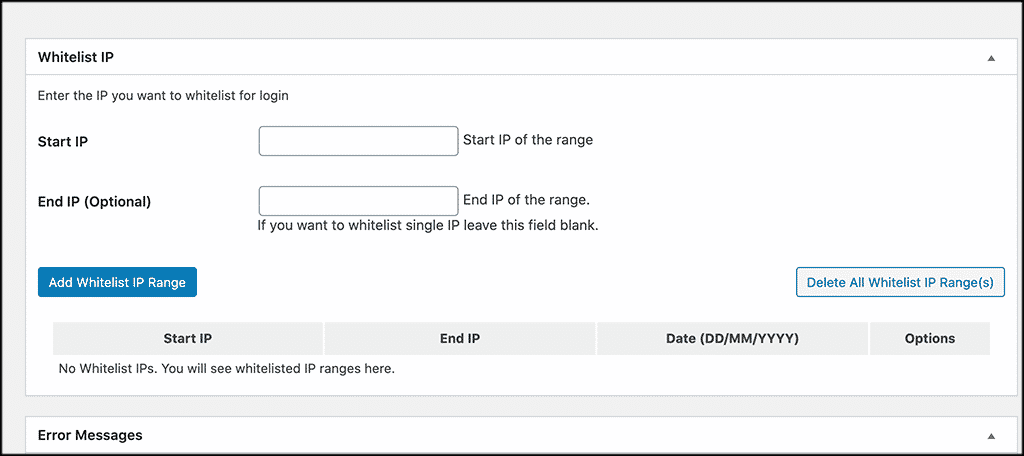
Last but not least, at the bottom of the page, you will see a configuration box for error messages in your website dashboard. Technically, you can see that there are two default messages. However, you can tweak the messages to state whatever you want.
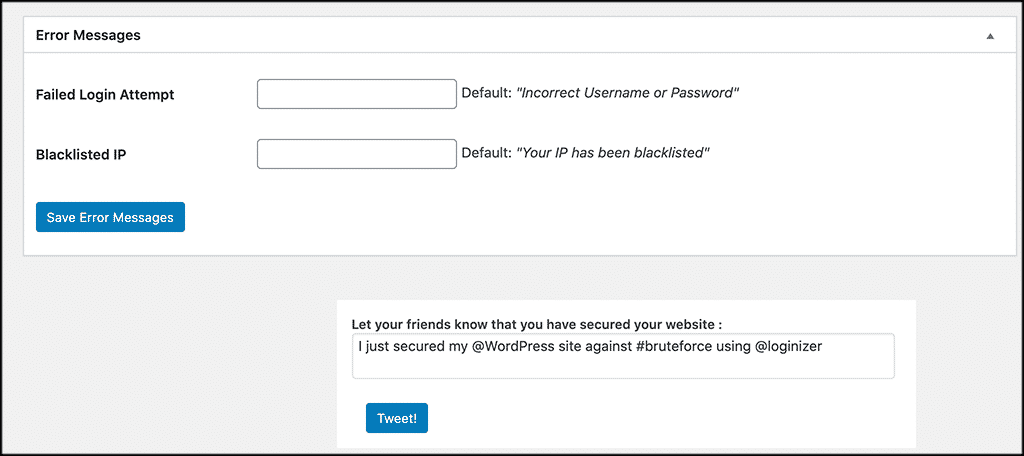
Be that as it may, don’t forget to click on the “Save” buttons as you go through all your options. That’s it! You have set up custom brute force protection using Loginizer and you are all set. You can adjust settings at any time.
Using Your Loginizer Plugin Dashboard Effectively
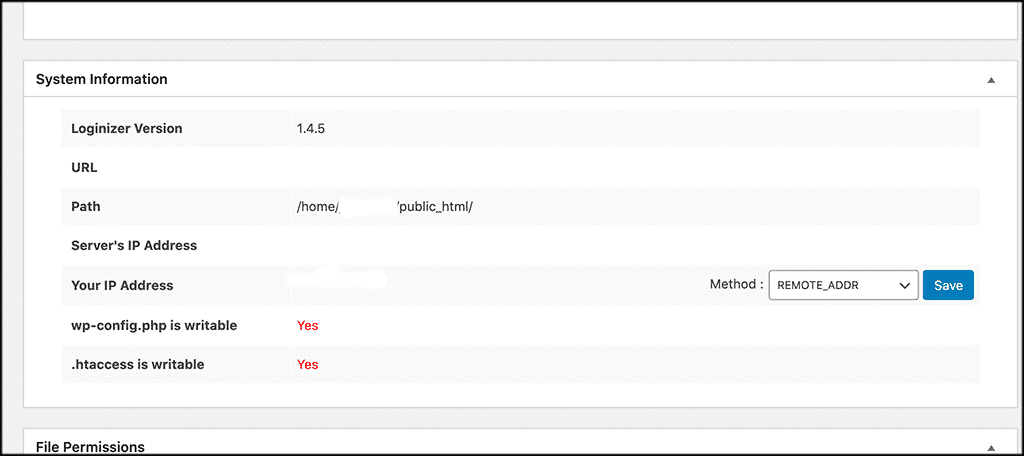
It also provides you with a dashboard so that you can monitor everything as it happens. To access this dashboard, click on Loginizer Security > Dashboard. Furthermore, you can see at the top of the dashboard all the system information.
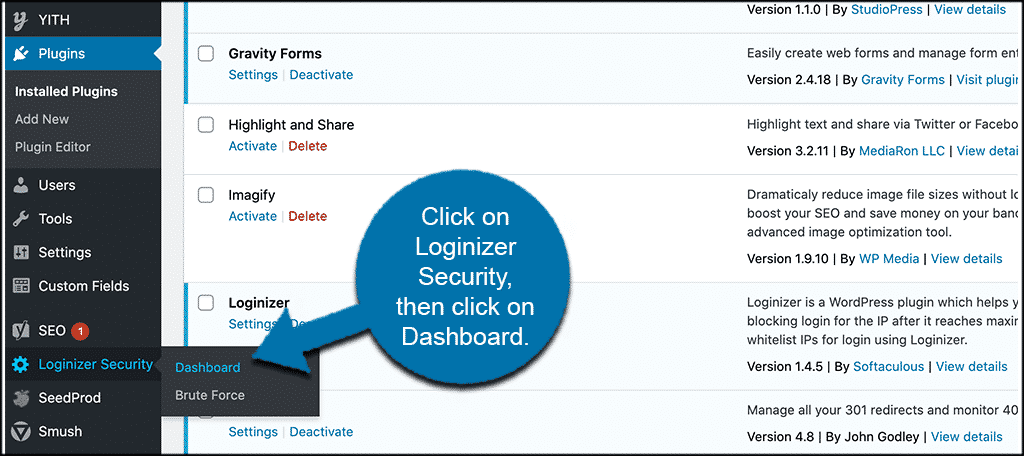
That being said, you can now go ahead and check out the system information to make sure all is running correctly.
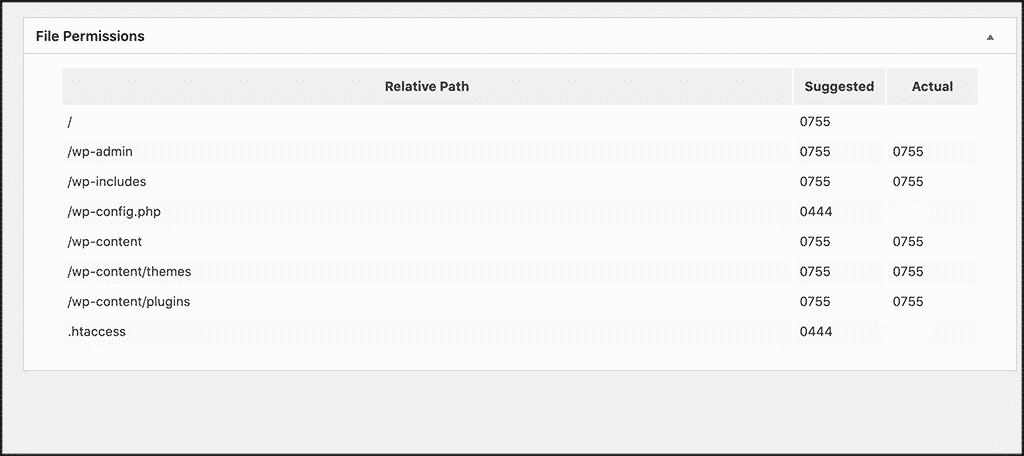
Below that, you can see all the file permissions such as those for the WP admin, WP includes, WP config.php, WP content (themes & plugins), and the WP htaccess. As well as their suggest and actual file permission code settings.
Be that as it may, we can provide a custom setup for your specific requirement. Just drop us an email with the details and we will get back to you asap. Moreover, our team of Web Tech Experts will be more than glad to sort you out. You can also share your additional thoughts, suggestions, recommendations, or even contribution questions for our FAQs in our comments.
Our Products
Above are just a few other tools related to the Loginizer Plugin that can greatly help you. Of course, your years of work perfecting your website and getting regular traffic to it can tell it all, yes! Whereby, you have worked so hard to build an identity and a brand with your customers. But, it could all get in vain due to a lack of security measures for your website.
Conclusion:
Brute force attacks have been a long-standing issue for website owners. Even though the method is fairly old, it is still very popular and widely used because of its effectiveness. There are certain steps to secure and protect your website always. One of the most important ones is having the ability to build custom brute force protection from the backend of your website.
So, has your website ever been the victim of a brute-force attack? Have you found that the Loginizer plugin has helped protect against this when used properly? The plugin is a fantastic way to get this process started and will work to immediately secure your website. With all the functionality and ability it gives, you should be able to build up a solid wall to protect your website.
As you can see, the Loginizer Plugin aims at securing your WordPress websites from all attacks. They believe that security is the most important aspect of a website and it should be easy to secure a website for any website owner, hence they work round the clock to craft features that help you achieve that without having to constantly monitor your WordPress website.
Before we conclude, you should also note that you can upgrade your Loginizer Plugin to enjoy other key benefits. After all, they have pricing plans available for all types of users from 1 website personal user to 100+ website agencies. If you loved this article guide, kindly feel free to share it with your friends and other readers like you online. You are welcome for more!